

Hey there, craft enthusiasts! If you're like me, you're always on the lookout for new and exciting DIY projects to add a touch of flair to your wardrobe. Today, I'm going to share with you how to make a stunning headband using gilded fabric. As a gilded fabric supplier, I've seen firsthand the transformative power of this luxurious material, and I'm excited to show you how you can incorporate it into your own handmade accessories.
What You'll Need
Before we dive into the step-by-step process, let's gather all the materials you'll need for this project:
- Gilded fabric: You can choose from a variety of gilded fabrics, such as silk, satin, or chiffon. The key is to select a fabric that has a beautiful sheen and a soft, drapey texture.
- Scissors: A sharp pair of scissors will make cutting the fabric much easier.
- Measuring tape: You'll need to measure the fabric to ensure you cut the right size for your headband.
- Needle and thread: You can use a sewing machine if you have one, but a needle and thread will work just fine for this project.
- Elastic band: This will be used to secure the headband around your head.
- Embellishments (optional): You can add beads, sequins, or other embellishments to your headband to make it even more unique.
Step 1: Measure and Cut the Fabric
The first step in making a headband with gilded fabric is to measure and cut the fabric to the right size. Here's how:
- Measure your head: Use a measuring tape to measure the circumference of your head where you want the headband to sit. Add a few inches to this measurement to allow for some stretch and overlap.
- Cut the fabric: Using your scissors, cut a strip of gilded fabric that is the same length as your measurement and about 2-3 inches wide. You can adjust the width depending on how wide you want your headband to be.
Step 2: Fold and Sew the Fabric
Once you have cut the fabric, it's time to fold and sew it to create the headband. Here's how:
- Fold the fabric in half lengthwise: Place the right sides of the fabric together and fold it in half lengthwise. Pin the edges together to keep them in place.
- Sew the edges: Using a needle and thread or a sewing machine, sew along the long edge of the fabric, leaving a small opening at one end. This opening will be used to turn the headband right side out.
- Turn the headband right side out: Carefully turn the headband right side out through the opening you left at one end. Use a pencil or other small object to push the corners out and make them nice and sharp.
- Sew the opening closed: Once the headband is right side out, use a needle and thread to sew the opening closed. You can use a hidden stitch to make the seam less noticeable.
Step 3: Add the Elastic Band
Now that you have sewn the fabric together to create the headband, it's time to add the elastic band to secure it around your head. Here's how:
- Measure the elastic band: Measure the elastic band to the same length as your head measurement. You can adjust the length depending on how tight you want the headband to fit.
- Attach the elastic band: Thread one end of the elastic band through the opening at one end of the headband. Sew the elastic band to the inside of the headband, making sure it is centered and secure.
- Thread the other end of the elastic band through the other end of the headband: Pull the elastic band through the headband until it is centered and the ends are even. Sew the other end of the elastic band to the inside of the headband, making sure it is secure.
Step 4: Add Embellishments (Optional)
If you want to add some extra sparkle and shine to your headband, you can add some embellishments. Here are some ideas:
- Beads: You can sew beads onto the headband using a needle and thread. You can create a simple pattern or just randomly scatter the beads for a more organic look.
- Sequins: Sequins are a great way to add some glamour to your headband. You can sew them onto the fabric using a needle and thread or use fabric glue to attach them.
- Ribbon: You can add a ribbon to the headband by sewing it onto the front or back. You can choose a ribbon that matches the color of the gilded fabric or go for a contrasting color for a more bold look.
Step 5: Try on Your Headband
Once you have added the elastic band and any embellishments, it's time to try on your headband and see how it looks. Adjust the fit if necessary by stretching or tightening the elastic band. You can also add or remove embellishments to make the headband more to your liking.
Tips and Tricks
- Choose the right fabric: As a gilded fabric supplier, I recommend choosing a fabric that has a beautiful sheen and a soft, drapey texture. Silk, satin, and chiffon are all great options.
- Use a sharp needle and thread: A sharp needle and thread will make it easier to sew the fabric and prevent it from fraying.
- Be careful when cutting the fabric: Gilded fabric can be slippery, so be careful when cutting it to avoid cutting yourself or making uneven cuts.
- Experiment with different embellishments: Don't be afraid to get creative and add different types of embellishments to your headband to make it unique.
Conclusion
Making a headband with gilded fabric is a fun and easy DIY project that anyone can do. With just a few simple materials and some basic sewing skills, you can create a beautiful and unique headband that will add a touch of glamour to any outfit. Whether you're looking for a new accessory for a special occasion or just want to add some sparkle to your everyday look, a gilded fabric headband is the perfect choice.
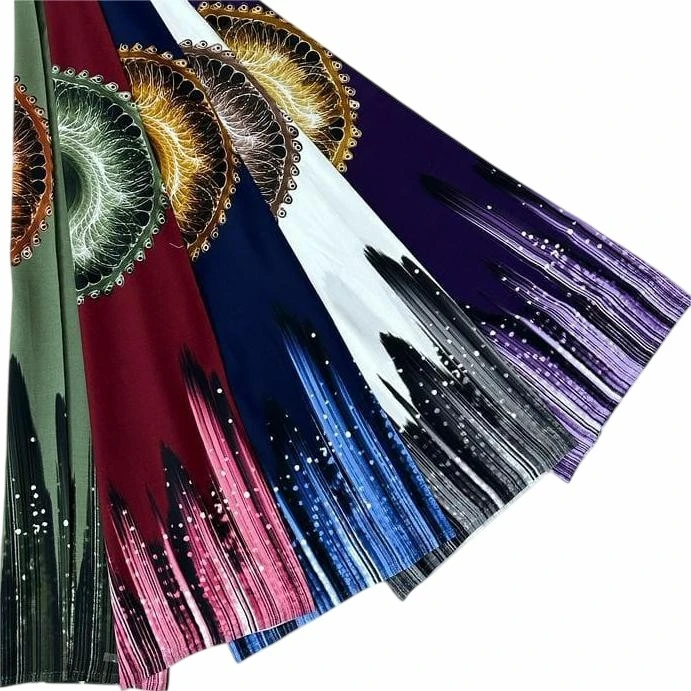

If you're interested in purchasing gilded fabric for your next DIY project, I'd love to hear from you. As a gilded fabric supplier, I offer a wide range of high-quality fabrics in a variety of colors and patterns. You can check out our Colorful Printed Viscose, Printing On Viscose Fabric, and Ditsy Print Viscose Fabric for some inspiration. Contact me to discuss your specific needs and let's start creating something beautiful together!
References
- Sewing Basics: A Beginner's Guide. Retrieved from https://www.sewing.org/basics
- DIY Headband Tutorials. Retrieved from https://www.diyheadbands.com/tutorials